XBOX CONTROLLER
CHARACTER ANIMATION
By Shane Brumback · · Free Three.js tutorial · Level 1
To control a 3D character with an Xbox controller in Three.js, poll navigator.getGamepads() every frame, turn the left stick into a heading and speed, and cross-fade the model's idle, walk, run, jump and punch clips with an AnimationMixer. A live controller panel lights up every button you press.
A beginner walkthrough of the Gamepad API, GLTFLoader clips and a neon grid floor shader. The soldier walking behind this page is the live demo, and the full copy-paste source is below.

LIVE DEMO
The soldier behind this page is a live Three.js scene. Plug in an Xbox controller and press any button: the panel below wakes up and the soldier is yours. Left stick moves, RT runs, A jumps, X punches, RB shoots, Y idles. No controller? Use WASD, Shift, Space, F and E. Launch the full-screen demo with a free Google sign-in; press Esc or Exit to return.
Heads up: Xbox controller support isn't in Super Soldier Battle yet. Coming soon.
Free Google sign-in · Xbox controller or keyboard · Esc to exit
READY FOR A REAL SHOOTER?
This Level 1 soldier walks, runs and jumps. The premium FPS controls tutorial adds pointer-lock mouse look, sprint-jump momentum, a firing watchdog and a training range, the same code behind Super Soldier Battle. Members unlock the full code; sign in to reveal it.
How the Gamepad API Works
Browsers can read game controllers through the Gamepad API. After you press a button, navigator.getGamepads() returns a snapshot of each controller: a buttons list (pressed or not, plus an analog value for triggers) and an axes list for the sticks, from -1 to 1. There are no button events, so a game asks for a fresh snapshot every frame.
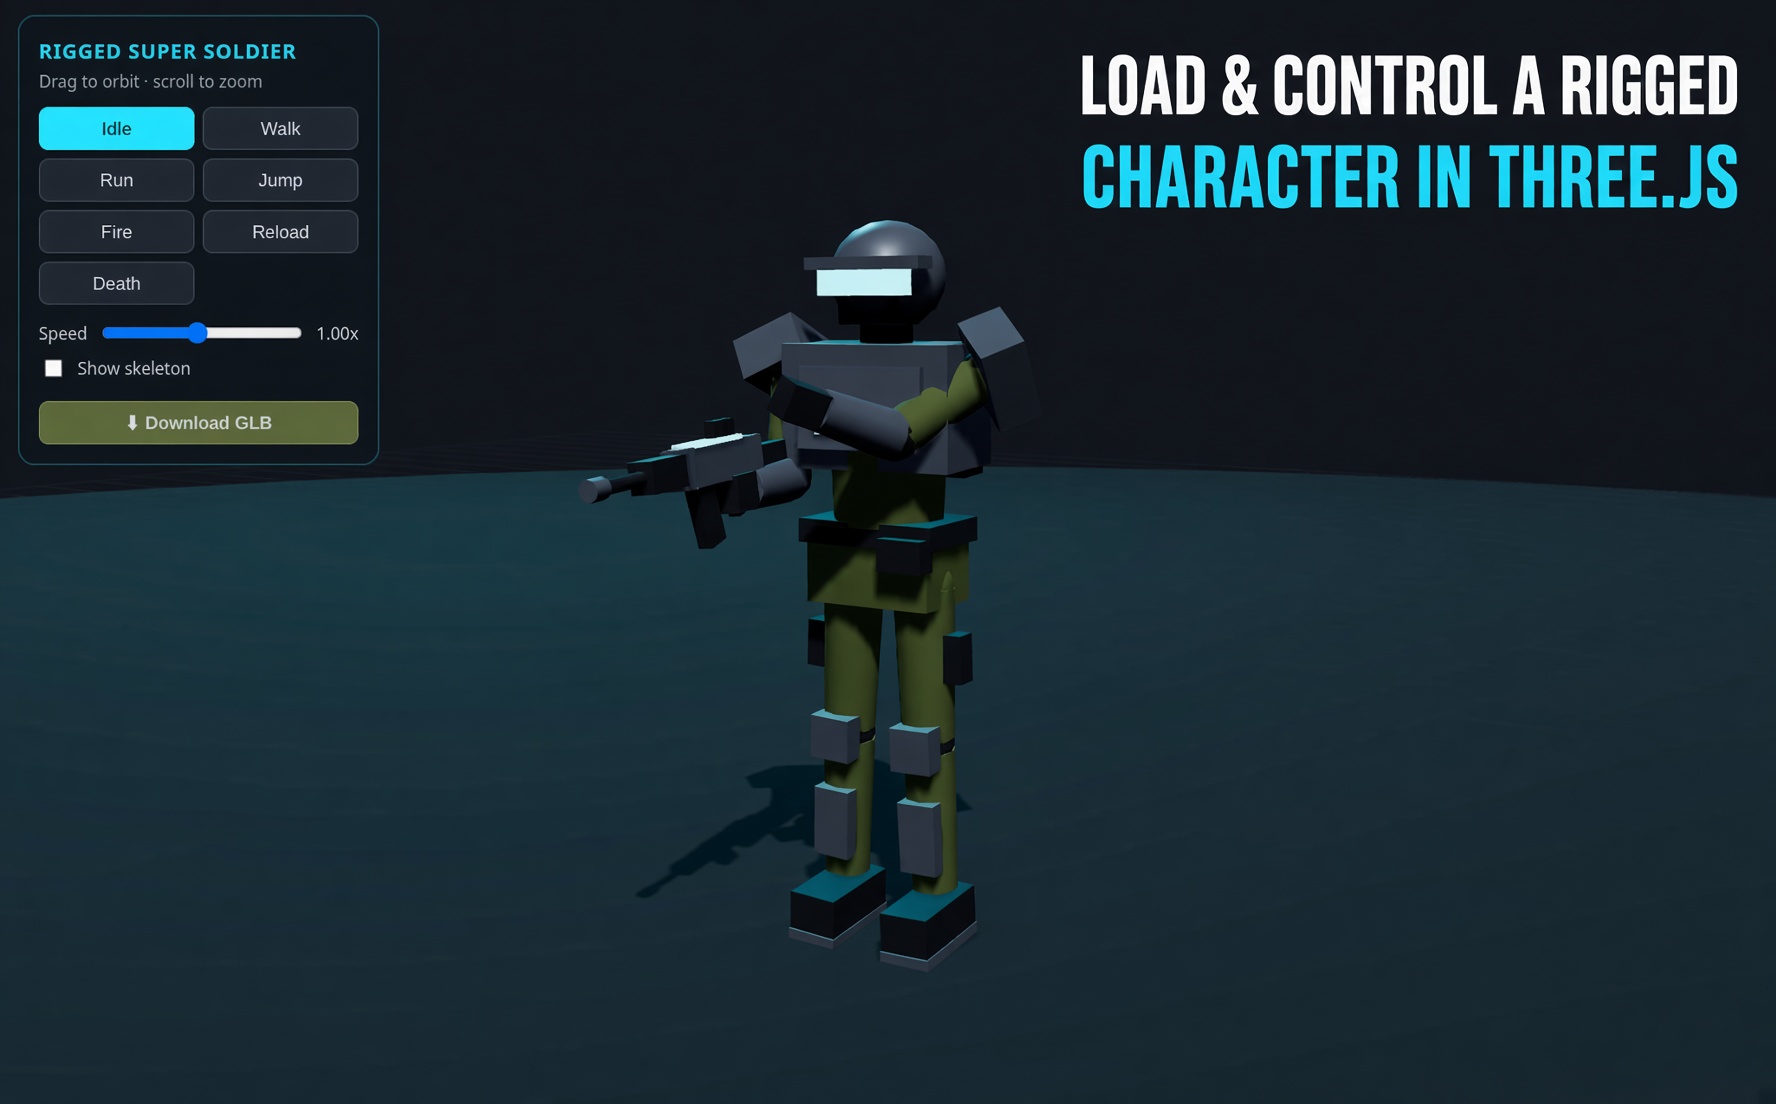
Want the story behind this demo first? Read the article Three.js Gamepad API: Xbox controller characters in the browser. New to animated models? Start with loading and animating a Grogu model or the rigged super soldier tutorial.
Step-by-Step Code Breakdown
Every excerpt below is copied exactly from the full code further down.
1. Set up the scene, camera and renderer
In plain words: we make a 3D world, a camera that looks at it and a renderer with soft shadows and filmic color. Create a Scene, a PerspectiveCamera and a WebGLRenderer with PCF soft shadows and ACES tone mapping, and cap the pixel ratio on phones.
const scene = new THREE.Scene();
const camera = new THREE.PerspectiveCamera(50, innerWidth / innerHeight, 0.1, 500);
camera.position.set(0, 3.2, 7.5);
const renderer = new THREE.WebGLRenderer({ antialias: true });
renderer.setPixelRatio(Math.min(devicePixelRatio, isMobile ? 1.5 : 2));
renderer.setSize(innerWidth, innerHeight);
renderer.shadowMap.enabled = true;
renderer.shadowMap.type = THREE.PCFSoftShadowMap;
renderer.toneMapping = THREE.ACESFilmicToneMapping;
renderer.toneMappingExposure = 1.1;
renderer.domElement.id = 'bg-canvas';
document.body.appendChild(renderer.domElement);
2. Paint a neon night sky and fog
In plain words: we wrap the world in a big inside-out ball that fades from teal at the horizon to near black overhead. A BackSide SphereGeometry with a tiny ShaderMaterial mixes two colors by height, and matching Fog hides the far edge of the floor.
const sky = new THREE.Mesh(new THREE.SphereGeometry(200, 32, 16), new THREE.ShaderMaterial({
  side: THREE.BackSide, depthWrite: false, fog: false,
  uniforms: { uTop: { value: new THREE.Color(0x05070d) }, uHorizon: { value: new THREE.Color(0x0e3a4a) } },
  vertexShader: `varying vec3 vDir; void main(){ vDir = normalize(position); gl_Position = projectionMatrix * modelViewMatrix * vec4(position,1.0); }`,
  fragmentShader: `uniform vec3 uTop; uniform vec3 uHorizon; varying vec3 vDir;
    void main(){ float h = max(vDir.y, 0.0); gl_FragColor = vec4(mix(uHorizon, uTop, pow(h, 0.45)), 1.0); }`
}));
scene.add(sky);
scene.fog = new THREE.Fog(0x0b2a36, 18, 70);
3. Add a sun and colored rim lights
In plain words: one bright light casts the shadow and two colored lights behind the soldier give him a cyan and magenta outline. A HemisphereLight fills, a DirectionalLight with castShadow acts as the sun, and two PointLights add neon rim light.
scene.add(new THREE.HemisphereLight(0x9fdfff, 0x101018, 1.2));
const sun = new THREE.DirectionalLight(0xffffff, 2.4);
sun.position.set(6, 12, 6);
sun.castShadow = true;
sun.shadow.mapSize.set(isMobile ? 1024 : 2048, isMobile ? 1024 : 2048);
Object.assign(sun.shadow.camera, { left: -12, right: 12, top: 12, bottom: -12 });
scene.add(sun, sun.target);
const rimA = new THREE.PointLight(0x2ad1d6, 40, 30); rimA.position.set(-4, 3, -3); scene.add(rimA);
const rimB = new THREE.PointLight(0xff3df2, 25, 30); rimB.position.set(4, 2.5, -4); scene.add(rimB);
4. Draw a glowing grid floor
In plain words: the floor is one big plane whose shader draws thin neon lines that pulse outward in rings. A ShaderMaterial uses fract and fwidth for crisp grid lines and a sine of distance minus time for the pulse, plus a ShadowMaterial plane to catch the soldier shadow.
const floorMat = new THREE.ShaderMaterial({
  uniforms: { uTime: { value: 0 } },
  vertexShader: `varying vec3 vW; void main(){ vec4 w = modelMatrix * vec4(position,1.0); vW = w.xyz; gl_Position = projectionMatrix * viewMatrix * w; }`,
  fragmentShader: `uniform float uTime; varying vec3 vW;
    void main(){
      vec2 g = abs(fract(vW.xz / 2.0 - 0.5) - 0.5) / fwidth(vW.xz / 2.0);
      float line = 1.0 - min(min(g.x, g.y), 1.0);
      float d = length(vW.xz);
      float pulse = 0.5 + 0.5 * sin(d * 0.6 - uTime * 2.0);
      vec3 base = vec3(0.02, 0.04, 0.07);
      vec3 neon = vec3(0.16, 0.82, 0.84) * (0.55 + 0.45 * pulse);
      float fade = exp(-d * 0.045);
      gl_FragColor = vec4(base + neon * line * fade, 1.0);
    }`
});
const floor = new THREE.Mesh(new THREE.PlaneGeometry(200, 200), floorMat);
floor.rotation.x = -Math.PI / 2;
scene.add(floor);
const shadowCatcher = new THREE.Mesh(new THREE.PlaneGeometry(200, 200), new THREE.ShadowMaterial({ opacity: 0.55 }));
shadowCatcher.rotation.x = -Math.PI / 2; shadowCatcher.position.y = 0.01; shadowCatcher.receiveShadow = true;
scene.add(shadowCatcher);
5. Load the character and its clips
In plain words: we load the SWAT soldier GLB file and turn each animation inside it into something we can play. GLTFLoader loads the model, an AnimationMixer wraps it, and every clip becomes a named action. Jump and Punching play once and hold their last frame.
let model = null, mixer = null, active = null;
const actions = {};
const ONE_SHOT = ['jump', 'punching'];
new GLTFLoader().load(MODEL_URL, (gltf) => {
  const body = gltf.scene;
  body.scale.setScalar(0.022);
  const box = new THREE.Box3().setFromObject(body);
  body.position.y -= box.min.y; // stand the feet on the floor
  model = new THREE.Group();
  model.add(body);
  body.traverse((o) => { if (o.isMesh) { o.castShadow = true; if (o.material) { o.material.metalness = 0; o.material.roughness = 0.8; } } });
  scene.add(model);
  mixer = new THREE.AnimationMixer(body);
  gltf.animations.forEach((clip) => {
    const a = mixer.clipAction(clip);
    const key = clip.name.toLowerCase();
    if (ONE_SHOT.includes(key)) { a.setLoop(THREE.LoopOnce); a.clampWhenFinished = true; }
    actions[key] = a;
  });
  mixer.addEventListener('finished', () => { busy = false; });
  play('idle');
  document.dispatchEvent(new CustomEvent('xbox-demo-ready'));
});
6. Cross-fade between animations
In plain words: when the soldier changes from standing to walking, the old move fades out while the new one fades in so nothing pops. play() fades the active action out and the next one in; oneShot() locks out other moves until the mixer finished event fires.
let busy = false;
function play(name, fade = 0.25) {
  const next = actions[name];
  if (!next || next === active) return;
  if (active) active.fadeOut(fade);
  next.reset().fadeIn(fade).play();
  active = next;
}
function oneShot(name) {
  if (busy || !actions[name]) return;
  busy = true; play(name, 0.12);
}
7. Read the Xbox controller
In plain words: every frame we ask the browser which buttons are pressed and where the sticks are, and fall back to the keyboard when no pad is plugged in. navigator.getGamepads() returns live Gamepad objects. The left stick is axes 0 and 1, A is button 0, X is 2, Y is 3, RB is 5 and RT is button 7 with an analog value. A dead zone ignores stick drift.
const keys = {};
addEventListener('keydown', (e) => { keys[e.code] = true; });
addEventListener('keyup', (e) => { keys[e.code] = false; });
const DEAD = 0.15;
const dz = (v) => (Math.abs(v) < DEAD ? 0 : v);
function readInput() {
  const pad = [...(navigator.getGamepads ? navigator.getGamepads() : [])].find(Boolean);
  const k = (c) => (keys[c] ? 1 : 0);
  const input = {
    x: k('KeyD') + k('ArrowRight') - k('KeyA') - k('ArrowLeft'),
    y: k('KeyS') + k('ArrowDown') - k('KeyW') - k('ArrowUp'),
    run: !!(keys.ShiftLeft || keys.ShiftRight), jump: !!keys.Space, punch: !!keys.KeyF, shoot: !!keys.KeyE, idle2: !!keys.KeyQ, pad
  };
  if (pad) {
    const b = (i) => !!(pad.buttons[i] && pad.buttons[i].pressed);
    input.x = dz(pad.axes[0]) || input.x;
    input.y = dz(pad.axes[1]) || input.y;
    input.run ||= (pad.buttons[7] ? pad.buttons[7].value > 0.3 : false);
    input.jump ||= b(0);
    input.punch ||= b(2);
    input.idle2 ||= b(3);
    input.shoot ||= b(5);
  }
  return input;
}
8. Move, turn and animate the soldier
In plain words: the stick points where the soldier should face; he turns toward it, walks or runs that way, and the camera follows. atan2 turns the stick into a heading, the shortest-angle difference eases the rotation, speed scales with stick distance, and an autopilot circles when nobody touches the controls for four seconds.
const heading = new THREE.Vector3();
let lastInput = performance.now(), autoT = 0, wasJump = false, wasPunch = false;
function update(dt, t) {
  if (!model) return;
  const inp = readInput();
  let x = inp.x, y = inp.y;
  const len = Math.hypot(x, y);
  if (len > 0 || inp.jump || inp.punch || inp.shoot || inp.idle2) lastInput = performance.now();
  const auto = performance.now() - lastInput > 4000;
  if (auto) { autoT += dt * 0.35; x = Math.cos(autoT); y = -Math.sin(autoT); }
  if (inp.jump && !wasJump) oneShot('jump');
  if (inp.punch && !wasPunch) oneShot('punching');
  wasJump = inp.jump; wasPunch = inp.punch;
  const mag = Math.min(Math.hypot(x, y), 1);
  if (mag > 0.01) {
    const target = Math.atan2(x, y);
    let diff = target - model.rotation.y;
    diff = Math.atan2(Math.sin(diff), Math.cos(diff));
    model.rotation.y += diff * Math.min(dt * 10, 1);
    const speed = (inp.run ? 10.0 : 1.8) * mag * (auto ? 0.8 : 1);
    heading.set(Math.sin(model.rotation.y), 0, Math.cos(model.rotation.y));
    model.position.addScaledVector(heading, speed * dt);
    model.position.x = THREE.MathUtils.clamp(model.position.x, -60, 60);
    model.position.z = THREE.MathUtils.clamp(model.position.z, -60, 60);
    if (!busy) play(inp.shoot ? 'walking-shooting' : inp.run ? 'running' : 'walking');
  } else if (!busy) {
    play(inp.idle2 ? 'bored' : 'idle');
  }
  // camera follows smoothly
  const want = model.position.clone().add(new THREE.Vector3(0, 3, 8.5));
  camera.position.lerp(want, Math.min(dt * 3, 1));
  camera.lookAt(model.position.x, model.position.y + 1.5, model.position.z);
  sun.position.set(model.position.x + 6, 12, model.position.z + 6);
  sun.target.position.copy(model.position);
  rimA.position.set(model.position.x - 4, 3, model.position.z - 3);
  rimB.position.set(model.position.x + 4, 2.5, model.position.z - 4);
}
9. Run the render loop
In plain words: about 60 times a second we update the floor, the soldier and his animation, then draw the picture. setAnimationLoop calls update with a capped Clock delta, advances the mixer and renders. On wide screens setViewOffset slides the scene right so text can sit on the left.
const clock = new THREE.Clock();
function frameView() {
  if (!demoOn && innerWidth >= 768) camera.setViewOffset(innerWidth, innerHeight, -innerWidth * 0.2, 0, innerWidth, innerHeight);
  else camera.clearViewOffset();
  camera.updateProjectionMatrix();
}
let demoOn = false;
renderer.setAnimationLoop(() => {
  const dt = Math.min(clock.getDelta(), 0.05);
  floorMat.uniforms.uTime.value += dt;
  update(dt);
  if (mixer) mixer.update(dt);
  renderer.render(scene, camera);
});
addEventListener('resize', () => {
  camera.aspect = innerWidth / innerHeight;
  renderer.setSize(innerWidth, innerHeight);
  frameView();
});
frameView();
window.__xboxDemo = { setInteractive(on) { demoOn = on; frameView(); } };
10. Build the Connect your controller panel
In plain words: we draw an Xbox controller as a picture whose buttons light up and sticks move when you press them for real. An inline SVG tags each button with its Gamepad index. gamepadconnected flips the panel to connected and shows the controller name; a requestAnimationFrame loop toggles a glow class, fills the trigger bars by value and offsets the stick circles by the axes.
function mount(root) {
root.innerHTML = SVG + '<div class="gp-status" role="status" aria-live="polite">Press any button to connect</div><div class="gp-sub">Plug in or pair an Xbox controller, then press a button.</div><div class="gp-keys">No controller? <kbd>WASD</kbd> move · <kbd>Shift</kbd> run · <kbd>Space</kbd> jump · <kbd>F</kbd> punch · <kbd>E</kbd> shoot</div>';
const status = root.querySelector('.gp-status'), sub = root.querySelector('.gp-sub');
const btns = [...root.querySelectorAll('[data-b]')], fills = [...root.querySelectorAll('[data-fill]')];
const sticks = [...root.querySelectorAll('[data-stick]')].map((el) => ({ el, i: +el.dataset.stick, cx: +el.getAttribute('cx'), cy: +el.getAttribute('cy') }));
function setConnected(pad) {
root.classList.toggle('on', !!pad);
status.textContent = pad ? 'Controller connected' : 'Press any button to connect';
sub.textContent = pad ? pad.id.replace(/\(.*?Vendor.*?\)/, '').trim().slice(0, 60) : 'Plug in or pair an Xbox controller, then press a button.';
}
addEventListener('gamepadconnected', (e) => setConnected(e.gamepad));
addEventListener('gamepaddisconnected', () => setConnected(null));
function tick() {
const pad = [...(navigator.getGamepads ? navigator.getGamepads() : [])].find(Boolean);
if (pad && !root.classList.contains('on')) setConnected(pad);
btns.forEach((el) => { const b = pad && pad.buttons[+el.dataset.b]; el.classList.toggle('hit', !!(b && b.pressed)); });
fills.forEach((el) => { const b = pad && pad.buttons[+el.dataset.fill]; el.setAttribute('width', (b ? b.value : 0) * 58); });
sticks.forEach((s) => { const ax = pad ? pad.axes[s.i] || 0 : 0, ay = pad ? pad.axes[s.i + 1] || 0 : 0; s.el.setAttribute('cx', s.cx + ax * 8); s.el.setAttribute('cy', s.cy + ay * 8); });
requestAnimationFrame(tick);
}
tick();
}Want touch controls too? Pair this with the mobile character controller, or add mouse look from the FPS controls tutorial.
The Full Code
Two ES modules: the scene and character controller, then the controller panel. Use the same import map as this page (Three.js 0.160 from unpkg), add <div class="gp-panel" data-gamepad-panel></div> for the panel, and host the SWAT GLB next to your page. No build tools needed.
// Xbox controller character demo: Three.js + Gamepad API (free tutorial code)
// Used as the live page background on the Xbox controller tutorial and article.
import * as THREE from 'three';
import { GLTFLoader } from 'three/addons/loaders/GLTFLoader.js';
const MODEL_URL = '/models/glb/swat/swat-character.glb';
const isMobile = matchMedia('(max-width: 768px)').matches;
// ---- 1. Scene, camera, renderer ----
const scene = new THREE.Scene();
const camera = new THREE.PerspectiveCamera(50, innerWidth / innerHeight, 0.1, 500);
camera.position.set(0, 3.2, 7.5);
const renderer = new THREE.WebGLRenderer({ antialias: true });
renderer.setPixelRatio(Math.min(devicePixelRatio, isMobile ? 1.5 : 2));
renderer.setSize(innerWidth, innerHeight);
renderer.shadowMap.enabled = true;
renderer.shadowMap.type = THREE.PCFSoftShadowMap;
renderer.toneMapping = THREE.ACESFilmicToneMapping;
renderer.toneMappingExposure = 1.1;
renderer.domElement.id = 'bg-canvas';
document.body.appendChild(renderer.domElement);
// ---- 2. Neon night sky and fog ----
const sky = new THREE.Mesh(new THREE.SphereGeometry(200, 32, 16), new THREE.ShaderMaterial({
side: THREE.BackSide, depthWrite: false, fog: false,
uniforms: { uTop: { value: new THREE.Color(0x05070d) }, uHorizon: { value: new THREE.Color(0x0e3a4a) } },
vertexShader: `varying vec3 vDir; void main(){ vDir = normalize(position); gl_Position = projectionMatrix * modelViewMatrix * vec4(position,1.0); }`,
fragmentShader: `uniform vec3 uTop; uniform vec3 uHorizon; varying vec3 vDir;
void main(){ float h = max(vDir.y, 0.0); gl_FragColor = vec4(mix(uHorizon, uTop, pow(h, 0.45)), 1.0); }`
}));
scene.add(sky);
scene.fog = new THREE.Fog(0x0b2a36, 18, 70);
// ---- 3. Lights: key sun plus cyan and magenta rim lights ----
scene.add(new THREE.HemisphereLight(0x9fdfff, 0x101018, 1.2));
const sun = new THREE.DirectionalLight(0xffffff, 2.4);
sun.position.set(6, 12, 6);
sun.castShadow = true;
sun.shadow.mapSize.set(isMobile ? 1024 : 2048, isMobile ? 1024 : 2048);
Object.assign(sun.shadow.camera, { left: -12, right: 12, top: 12, bottom: -12 });
scene.add(sun, sun.target);
const rimA = new THREE.PointLight(0x2ad1d6, 40, 30); rimA.position.set(-4, 3, -3); scene.add(rimA);
const rimB = new THREE.PointLight(0xff3df2, 25, 30); rimB.position.set(4, 2.5, -4); scene.add(rimB);
// ---- 4. Glowing grid floor ----
const floorMat = new THREE.ShaderMaterial({
uniforms: { uTime: { value: 0 } },
vertexShader: `varying vec3 vW; void main(){ vec4 w = modelMatrix * vec4(position,1.0); vW = w.xyz; gl_Position = projectionMatrix * viewMatrix * w; }`,
fragmentShader: `uniform float uTime; varying vec3 vW;
void main(){
vec2 g = abs(fract(vW.xz / 2.0 - 0.5) - 0.5) / fwidth(vW.xz / 2.0);
float line = 1.0 - min(min(g.x, g.y), 1.0);
float d = length(vW.xz);
float pulse = 0.5 + 0.5 * sin(d * 0.6 - uTime * 2.0);
vec3 base = vec3(0.02, 0.04, 0.07);
vec3 neon = vec3(0.16, 0.82, 0.84) * (0.55 + 0.45 * pulse);
float fade = exp(-d * 0.045);
gl_FragColor = vec4(base + neon * line * fade, 1.0);
}`
});
const floor = new THREE.Mesh(new THREE.PlaneGeometry(200, 200), floorMat);
floor.rotation.x = -Math.PI / 2;
scene.add(floor);
const shadowCatcher = new THREE.Mesh(new THREE.PlaneGeometry(200, 200), new THREE.ShadowMaterial({ opacity: 0.55 }));
shadowCatcher.rotation.x = -Math.PI / 2; shadowCatcher.position.y = 0.01; shadowCatcher.receiveShadow = true;
scene.add(shadowCatcher);
// ---- 5. Load the character and its animation clips ----
let model = null, mixer = null, active = null;
const actions = {};
const ONE_SHOT = ['jump', 'punching'];
new GLTFLoader().load(MODEL_URL, (gltf) => {
const body = gltf.scene;
body.scale.setScalar(0.022);
const box = new THREE.Box3().setFromObject(body);
body.position.y -= box.min.y; // stand the feet on the floor
model = new THREE.Group();
model.add(body);
body.traverse((o) => { if (o.isMesh) { o.castShadow = true; if (o.material) { o.material.metalness = 0; o.material.roughness = 0.8; } } });
scene.add(model);
mixer = new THREE.AnimationMixer(body);
gltf.animations.forEach((clip) => {
const a = mixer.clipAction(clip);
const key = clip.name.toLowerCase();
if (ONE_SHOT.includes(key)) { a.setLoop(THREE.LoopOnce); a.clampWhenFinished = true; }
actions[key] = a;
});
mixer.addEventListener('finished', () => { busy = false; });
play('idle');
document.dispatchEvent(new CustomEvent('xbox-demo-ready'));
});
// ---- 6. Cross-fade between clips ----
let busy = false;
function play(name, fade = 0.25) {
const next = actions[name];
if (!next || next === active) return;
if (active) active.fadeOut(fade);
next.reset().fadeIn(fade).play();
active = next;
}
function oneShot(name) {
if (busy || !actions[name]) return;
busy = true; play(name, 0.12);
}
// ---- 7. Read the controller (with keyboard fallback) ----
const keys = {};
addEventListener('keydown', (e) => { keys[e.code] = true; });
addEventListener('keyup', (e) => { keys[e.code] = false; });
const DEAD = 0.15;
const dz = (v) => (Math.abs(v) < DEAD ? 0 : v);
function readInput() {
const pad = [...(navigator.getGamepads ? navigator.getGamepads() : [])].find(Boolean);
const k = (c) => (keys[c] ? 1 : 0);
const input = {
x: k('KeyD') + k('ArrowRight') - k('KeyA') - k('ArrowLeft'),
y: k('KeyS') + k('ArrowDown') - k('KeyW') - k('ArrowUp'),
run: !!(keys.ShiftLeft || keys.ShiftRight), jump: !!keys.Space, punch: !!keys.KeyF, shoot: !!keys.KeyE, idle2: !!keys.KeyQ, pad
};
if (pad) {
const b = (i) => !!(pad.buttons[i] && pad.buttons[i].pressed);
input.x = dz(pad.axes[0]) || input.x;
input.y = dz(pad.axes[1]) || input.y;
input.run ||= (pad.buttons[7] ? pad.buttons[7].value > 0.3 : false);
input.jump ||= b(0);
input.punch ||= b(2);
input.idle2 ||= b(3);
input.shoot ||= b(5);
}
return input;
}
// ---- 8. Move, turn and animate the character ----
const heading = new THREE.Vector3();
let lastInput = performance.now(), autoT = 0, wasJump = false, wasPunch = false;
function update(dt, t) {
if (!model) return;
const inp = readInput();
let x = inp.x, y = inp.y;
const len = Math.hypot(x, y);
if (len > 0 || inp.jump || inp.punch || inp.shoot || inp.idle2) lastInput = performance.now();
const auto = performance.now() - lastInput > 4000;
if (auto) { autoT += dt * 0.35; x = Math.cos(autoT); y = -Math.sin(autoT); }
if (inp.jump && !wasJump) oneShot('jump');
if (inp.punch && !wasPunch) oneShot('punching');
wasJump = inp.jump; wasPunch = inp.punch;
const mag = Math.min(Math.hypot(x, y), 1);
if (mag > 0.01) {
const target = Math.atan2(x, y);
let diff = target - model.rotation.y;
diff = Math.atan2(Math.sin(diff), Math.cos(diff));
model.rotation.y += diff * Math.min(dt * 10, 1);
const speed = (inp.run ? 10.0 : 1.8) * mag * (auto ? 0.8 : 1);
heading.set(Math.sin(model.rotation.y), 0, Math.cos(model.rotation.y));
model.position.addScaledVector(heading, speed * dt);
model.position.x = THREE.MathUtils.clamp(model.position.x, -60, 60);
model.position.z = THREE.MathUtils.clamp(model.position.z, -60, 60);
if (!busy) play(inp.shoot ? 'walking-shooting' : inp.run ? 'running' : 'walking');
} else if (!busy) {
play(inp.idle2 ? 'bored' : 'idle');
}
// camera follows smoothly
const want = model.position.clone().add(new THREE.Vector3(0, 3, 8.5));
camera.position.lerp(want, Math.min(dt * 3, 1));
camera.lookAt(model.position.x, model.position.y + 1.5, model.position.z);
sun.position.set(model.position.x + 6, 12, model.position.z + 6);
sun.target.position.copy(model.position);
rimA.position.set(model.position.x - 4, 3, model.position.z - 3);
rimB.position.set(model.position.x + 4, 2.5, model.position.z - 4);
}
// ---- 9. Render loop ----
const clock = new THREE.Clock();
function frameView() {
if (!demoOn && innerWidth >= 768) camera.setViewOffset(innerWidth, innerHeight, -innerWidth * 0.2, 0, innerWidth, innerHeight);
else camera.clearViewOffset();
camera.updateProjectionMatrix();
}
let demoOn = false;
renderer.setAnimationLoop(() => {
const dt = Math.min(clock.getDelta(), 0.05);
floorMat.uniforms.uTime.value += dt;
update(dt);
if (mixer) mixer.update(dt);
renderer.render(scene, camera);
});
addEventListener('resize', () => {
camera.aspect = innerWidth / innerHeight;
renderer.setSize(innerWidth, innerHeight);
frameView();
});
frameView();
window.__xboxDemo = { setInteractive(on) { demoOn = on; frameView(); } };
// ===== js/gamepad-panel.js =====
// "Connect your controller" panel: live Gamepad API visualizer (free tutorial code)
// Usage: <div class="gp-panel" data-gamepad-panel></div> <script type="module" src="/js/gamepad-panel.js"></script>
const CSS = `
.gp-panel{background:rgba(5,9,16,.82);border:1px solid rgba(42,209,214,.35);border-radius:18px;padding:18px 18px 14px;text-align:center;box-shadow:0 0 30px rgba(42,209,214,.12);max-width:440px;margin:0 auto;font-family:Inter,system-ui,sans-serif}
.gp-panel svg{width:100%;height:auto;display:block}
.gp-status{font:700 1.05rem/1.2 'Bebas Neue',sans-serif;letter-spacing:1px;color:#2ad1d6;margin-top:8px}
.gp-sub{font-size:.78rem;color:#9ca3af;margin-top:4px;min-height:1.1em}
.gp-panel:not(.on) .gp-body{animation:gpPulse 2s ease-in-out infinite}
.gp-panel:not(.on) .gp-status{animation:gpBlink 2s ease-in-out infinite}
@keyframes gpPulse{0%,100%{filter:drop-shadow(0 0 2px rgba(42,209,214,.3))}50%{filter:drop-shadow(0 0 14px rgba(42,209,214,.9))}}
@keyframes gpBlink{0%,100%{opacity:1}50%{opacity:.45}}
.gp-panel.on{border-color:rgba(22,163,74,.7);box-shadow:0 0 30px rgba(22,163,74,.25)}
.gp-panel.on .gp-status{color:#4ade80}
.gp-btn{transition:fill .06s,filter .06s}
.gp-btn.hit{filter:drop-shadow(0 0 6px currentColor) brightness(1.8)}
.gp-keys{font-size:.72rem;color:#9ca3af;margin-top:8px}
.gp-keys kbd{background:#11131a;border:1px solid rgba(255,255,255,.18);border-radius:5px;padding:1px 5px;color:#e5e7eb;font-family:inherit}
`;
const SVG = `<svg viewBox="0 0 320 200" aria-hidden="true">
<defs><linearGradient id="gpG" x1="0" y1="0" x2="0" y2="1"><stop offset="0" stop-color="#1f2937"/><stop offset="1" stop-color="#0b1018"/></linearGradient></defs>
<rect class="gp-btn" data-b="6" x="62" y="6" width="58" height="14" rx="7" fill="#1f2937" color="#2ad1d6"/>
<rect class="gp-btn" data-b="7" x="200" y="6" width="58" height="14" rx="7" fill="#1f2937" color="#2ad1d6"/>
<rect data-fill="6" x="62" y="6" width="0" height="14" rx="7" fill="#2ad1d6" opacity=".85"/>
<rect data-fill="7" x="200" y="6" width="0" height="14" rx="7" fill="#2ad1d6" opacity=".85"/>
<rect class="gp-btn" data-b="4" x="58" y="24" width="66" height="10" rx="5" fill="#374151" color="#2ad1d6"/>
<rect class="gp-btn" data-b="5" x="196" y="24" width="66" height="10" rx="5" fill="#374151" color="#2ad1d6"/>
<path class="gp-body" d="M70 38h180c30 0 46 22 54 60l12 58c5 24-18 38-36 22l-34-32H74l-34 32c-18 16-41 2-36-22l12-58c8-38 24-60 54-60z" fill="url(#gpG)" stroke="#2ad1d6" stroke-width="2"/>
<circle class="gp-btn" data-b="16" cx="160" cy="62" r="11" fill="#111827" stroke="#4ade80" stroke-width="2" color="#4ade80"/>
<circle class="gp-btn" data-b="8" cx="138" cy="86" r="5" fill="#374151" color="#fff"/>
<circle class="gp-btn" data-b="9" cx="182" cy="86" r="5" fill="#374151" color="#fff"/>
<circle cx="88" cy="80" r="20" fill="#0b1018" stroke="#374151" stroke-width="2"/>
<circle class="gp-btn" data-b="10" data-stick="0" cx="88" cy="80" r="12" fill="#4b5563" color="#2ad1d6"/>
<circle cx="196" cy="124" r="20" fill="#0b1018" stroke="#374151" stroke-width="2"/>
<circle class="gp-btn" data-b="11" data-stick="2" cx="196" cy="124" r="12" fill="#4b5563" color="#2ad1d6"/>
<rect class="gp-btn" data-b="12" x="117" y="104" width="12" height="14" fill="#4b5563" color="#fff"/>
<rect class="gp-btn" data-b="13" x="117" y="130" width="12" height="14" fill="#4b5563" color="#fff"/>
<rect class="gp-btn" data-b="14" x="103" y="118" width="14" height="12" fill="#4b5563" color="#fff"/>
<rect class="gp-btn" data-b="15" x="129" y="118" width="14" height="12" fill="#4b5563" color="#fff"/>
<circle class="gp-btn" data-b="3" cx="234" cy="62" r="9" fill="#a16207" color="#facc15"/>
<circle class="gp-btn" data-b="2" cx="216" cy="80" r="9" fill="#1d4ed8" color="#60a5fa"/>
<circle class="gp-btn" data-b="1" cx="252" cy="80" r="9" fill="#b91c1c" color="#f87171"/>
<circle class="gp-btn" data-b="0" cx="234" cy="98" r="9" fill="#15803d" color="#4ade80"/>
<g font-family="Inter,sans-serif" font-size="8" font-weight="700" fill="#fff" text-anchor="middle" pointer-events="none">
<text x="234" y="65">Y</text><text x="216" y="83">X</text><text x="252" y="83">B</text><text x="234" y="101">A</text>
<text x="91" y="17" fill="#9ca3af">LT</text><text x="229" y="17" fill="#9ca3af">RT</text></g>
</svg>`;
function mount(root) {
root.innerHTML = SVG + '<div class="gp-status" role="status" aria-live="polite">Press any button to connect</div><div class="gp-sub">Plug in or pair an Xbox controller, then press a button.</div><div class="gp-keys">No controller? <kbd>WASD</kbd> move · <kbd>Shift</kbd> run · <kbd>Space</kbd> jump · <kbd>F</kbd> punch · <kbd>E</kbd> shoot</div>';
const status = root.querySelector('.gp-status'), sub = root.querySelector('.gp-sub');
const btns = [...root.querySelectorAll('[data-b]')], fills = [...root.querySelectorAll('[data-fill]')];
const sticks = [...root.querySelectorAll('[data-stick]')].map((el) => ({ el, i: +el.dataset.stick, cx: +el.getAttribute('cx'), cy: +el.getAttribute('cy') }));
function setConnected(pad) {
root.classList.toggle('on', !!pad);
status.textContent = pad ? 'Controller connected' : 'Press any button to connect';
sub.textContent = pad ? pad.id.replace(/\(.*?Vendor.*?\)/, '').trim().slice(0, 60) : 'Plug in or pair an Xbox controller, then press a button.';
}
addEventListener('gamepadconnected', (e) => setConnected(e.gamepad));
addEventListener('gamepaddisconnected', () => setConnected(null));
function tick() {
const pad = [...(navigator.getGamepads ? navigator.getGamepads() : [])].find(Boolean);
if (pad && !root.classList.contains('on')) setConnected(pad);
btns.forEach((el) => { const b = pad && pad.buttons[+el.dataset.b]; el.classList.toggle('hit', !!(b && b.pressed)); });
fills.forEach((el) => { const b = pad && pad.buttons[+el.dataset.fill]; el.setAttribute('width', (b ? b.value : 0) * 58); });
sticks.forEach((s) => { const ax = pad ? pad.axes[s.i] || 0 : 0, ay = pad ? pad.axes[s.i + 1] || 0 : 0; s.el.setAttribute('cx', s.cx + ax * 8); s.el.setAttribute('cy', s.cy + ay * 8); });
requestAnimationFrame(tick);
}
tick();
}
if (!document.getElementById('gp-panel-css')) { const s = document.createElement('style'); s.id = 'gp-panel-css'; s.textContent = CSS; document.head.appendChild(s); }
document.querySelectorAll('[data-gamepad-panel]').forEach(mount);
Frequently Asked Questions
How do you use an Xbox controller in Three.js?
Plug the controller in by USB or Bluetooth, press any button so the page can see it, then call navigator.getGamepads() every frame. Read the stick values from axes and the buttons from the buttons array, and use them to move and animate your Three.js objects.
Why does my gamepad not show up in the browser?
Browsers hide gamepads until you press a button while the page has focus, for privacy. Listen for the gamepadconnected event or poll navigator.getGamepads() after a press. The page should also be served over https or localhost.
Which Xbox buttons map to which Gamepad API indexes?
In the standard mapping A is 0, B is 1, X is 2, Y is 3, LB is 4, RB is 5, LT is 6, RT is 7, View is 8, Menu is 9, the stick clicks are 10 and 11, the D-pad is 12 to 15 and the Xbox button is 16. The left stick is axes 0 and 1, the right stick axes 2 and 3.
How do you blend between walk and idle animations?
Keep one AnimationAction per clip from an AnimationMixer. To switch, call fadeOut on the current action and reset().fadeIn().play() on the next one with the same short duration, such as 0.25 seconds.
What is a stick dead zone?
Analog sticks never rest exactly at zero, so a small value like 0.05 can make a character creep. A dead zone treats anything under a threshold, 0.15 in this demo, as zero.
Why do I need to sign in to launch the live demo?
The tutorial and its full code are free to read. The full-screen Live Demo asks for a free Google sign-in first, the same gate used across the site, so I know who is learning from these tutorials.
Play It and Keep Learning
Controller-driven soldiers like this one power Super Soldier Battle, free in your browser. Read the Xbox controller article, browse every Three.js tutorial or search the site.
Need gamepad support or character work in a Three.js project? I take freelance and contract work: contact me.
Play Game